
How to manage your ACE application lifecycle in CP4I using Jenkins
This blog is a detailed version of a video blog that we have produced. Both blogs walk you through the lifecycle management of an IBM App Connect Enterprise (ACE) application using Jenkins. Watch the YouTube video, if you dislike reading. For this demo, we have adopted the DevOps model as mentioned in our “Deploy ACE integrations automatically onto CP4I” blog.
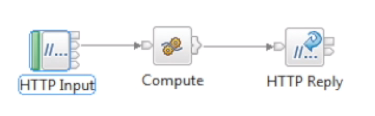
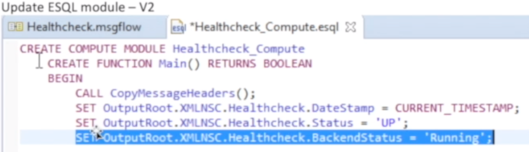
We are going to use a simple HealthCheck application as shown below. The application responds with the current timestamp and a status message.
As a prerequisite, you need to create an ACE dashboard in CP4I to visualise the deployed ACE applications in the OpenShift cluster. You can refer to the below links on this topic:
- Syntegrity blog: Refer to Step 4
- IBM blog
HIGH LEVEL SEQUENCE
- Build and push ACE container image with Version 1 of the application to the image registry
- Deploy to CP4I and verify
- Build and push ACE container image with Version 2 of the application to the image registry
- Update application in CP4I using Jenkins and verify
- View tracing and flow statistics
- Rollback to Version 1
- Delete the application from CP4I
DETAILED STEPS
STEP 1 – BUILD AND PUSH ACE CONTAINER IMAGE WITH VERSION 1 OF THE APPLICATION TO THE IMAGE REGISTRY
To build and push the container image to the internal OpenShift image registry we have built a Jenkins pipeline as shown below:

We have already developed this application using the ACE toolkit and committed the source code to a git repository. To generate a deployable artefact, this pipeline was triggered manually. You could configure a webhook to trigger it automatically. The pipeline performed the following activities:
- Checkout source code from Git;
- Build and override the application bar;
- Upload the bar file to a Nexus repository;
- Create a deployable ACE (docker) container image based on IBM certified ACE base container image;
- Tag and push the container image to the OpenShift internal registry.
Upon completion, we saw the output (below) using OpenShift cluster (oc) command. The tag name “v7.0.0.0-amd64” represents Version 1 of the application image.
![]()
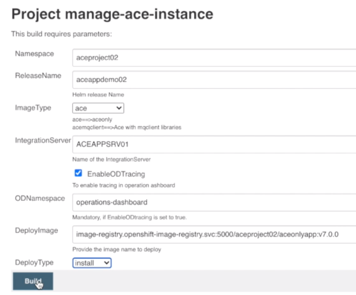
STEP 2 – DEPLOY TO CP4I AND VERIFY
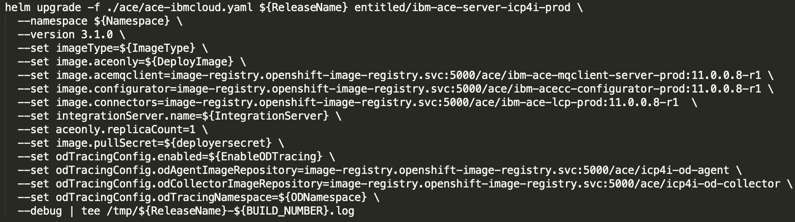
We have configured a Jenkins job to manage our deployment to the CP4I platform. This job created the necessary access controls, secrets and leveraged the IBM supplied helm charts to deploy the ACE container image into the cluster.

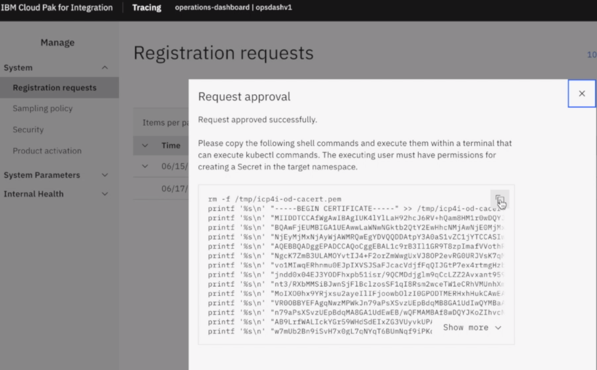
We have enabled the tracing capability as part of the application install, the trace enablement created a registration request as part of the deployment process. We must approve the registration request in order to complete the pod deployment.
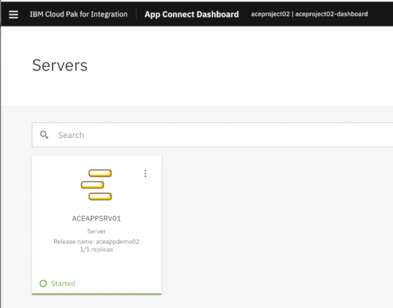
The ACE dashboard showed the integration server and the application message flow running once the deployment is completed.
We used cURL to test the deployed application. The application returned a successful response as shown below.

STEP 3 – BUILD AND PUSH ACE CONTAINER IMAGE WITH VERSION 2 OF THE APPLICATION TO THE IMAGE REGISTRY
We have updated our application to include the backend status in the application response and pushed the change to the git repository. The pipeline is executed again as described in STEP 1.
The new image was pushed to the OpenShift registry with the tag name “v7.0.0.1-amd64”.
![]()
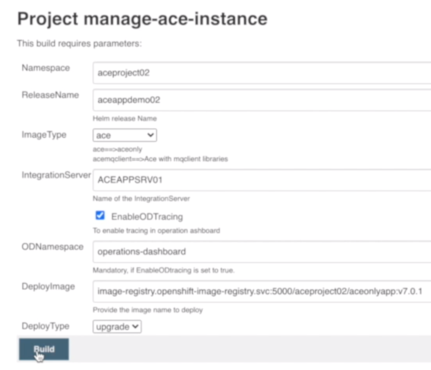
STEP 4 – DEPLOY THE APPLICATION UPDATE IN CP4I USING JENKINS AND VERIFY
We executed the same Jenkins job to perform an upgrade of the application runtime by changing the container image name and helm deploy type.
Retested the application to verify “BackendStatus” element in the response once the deployment is completed.

STEP 5 – VIEW TRACING AND FLOW STATISTICS
In order to view tracing and flow statistics information, we submitted a constant number of requests to the application for a period of time.
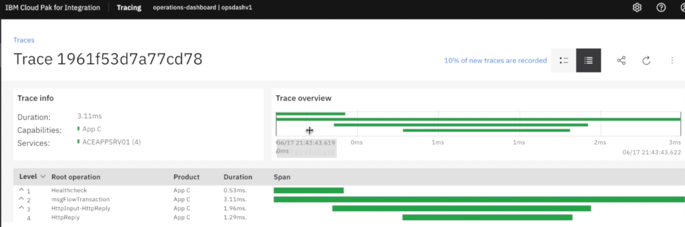
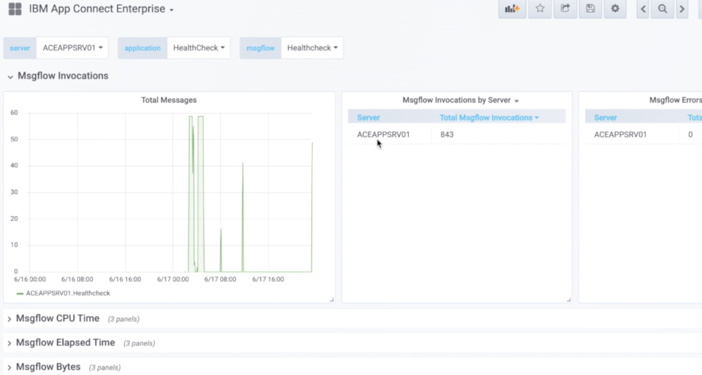
CP4I is pre-configured with the following open source tools for monitoring, logging, visualisation and tracing.
STEP 6 – ROLLBACK TO VERSION 1
To rollback the application update, we performed a helm upgrade using the Version1 container image. You could also choose “helm rollback” command to rollback to a previous revision of the application.
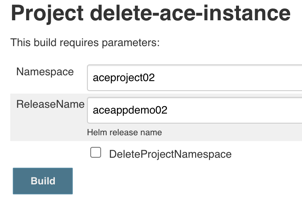
STEP 7 – DELETE THE APPLICATION FROM CP4I
To delete the application, we executed a job which removed the pods and their dependencies from CP4I. The job used the “helm delete” command to clear the resources from the cluster environment.
TO KNOW MORE
- Contact us
- Register for the IBM Cloud Forum 2020 to watch the demo
- Request to watch the demo on YouTube
CHECK THE LINKS LATER